¶ Compatibility
This guide applies to the following machine. Please note when referencing:
Machine model: U1
¶ Issue Description
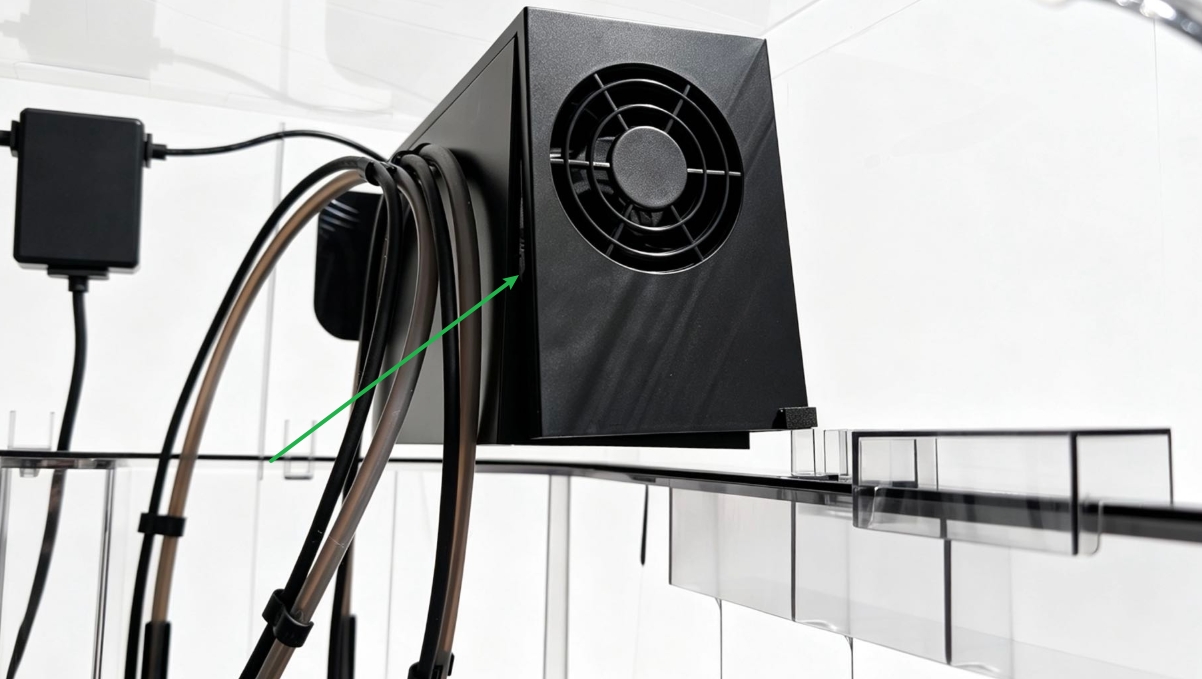
The air duct of the External Circulation Kit is misaligned with the Heat Dissipation Air Inlet Cover, resulting in an improper assembly position between the two components.
¶ Possible Causes
-
During transportation, the machine may be subjected to external forces such as handling, vibration, compression, or impact, which may cause slight displacement or misalignment between components such as the air duct and housing. Such conditions are generally mechanical positional shifts caused during transportation and do not indicate structural or functional damage to the components.
-
For cases involving only positional displacement, changes in assembly gaps, or local misalignment, after confirming that there is no obvious deformation, breakage, cracking, or other damage to the components, the issue can generally be resolved by readjusting the component positions and restoring the correct assembly relationship. Such adjustments will not cause irreversible damage.
-
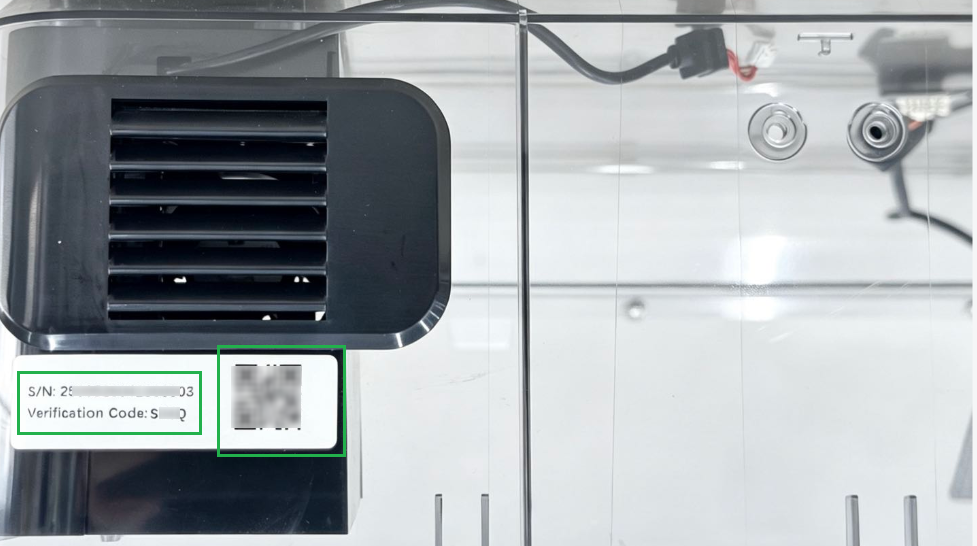
If you encounter this issue, refer to this guide for adjustment. Please also provide the SN and Verification Code of the Top Cover Assembly to technical support
¶ Quick Overview
Repair Difficulty: ★☆☆☆☆ (Easy)
Estimated Time: 10 minutes
¶ Preparation
¶ Procedure
¶ Part 1 - Top Cover Disassembly
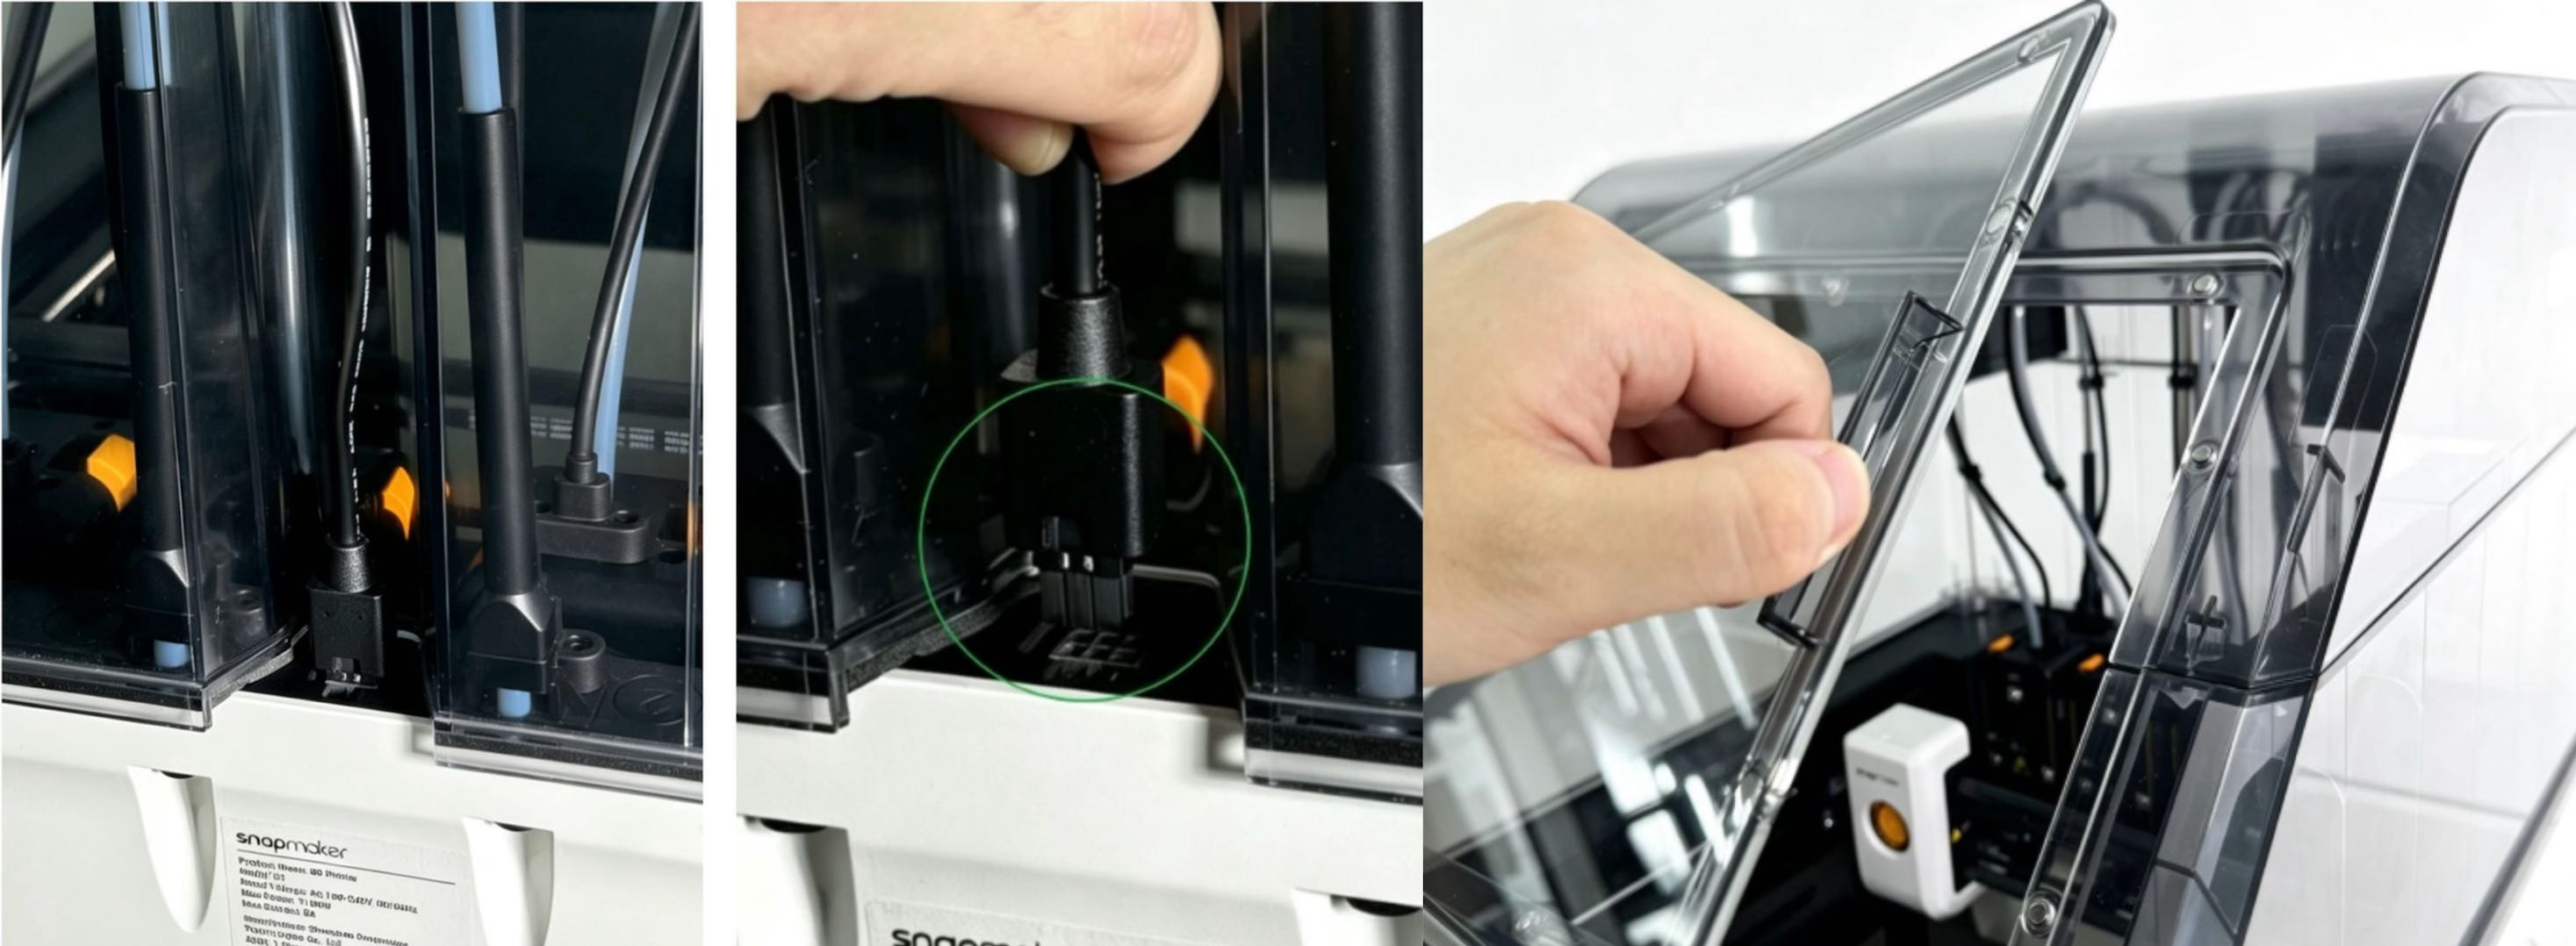
(1) Disconnect the Top Cover Cable and remove the Magnetic Front Door.
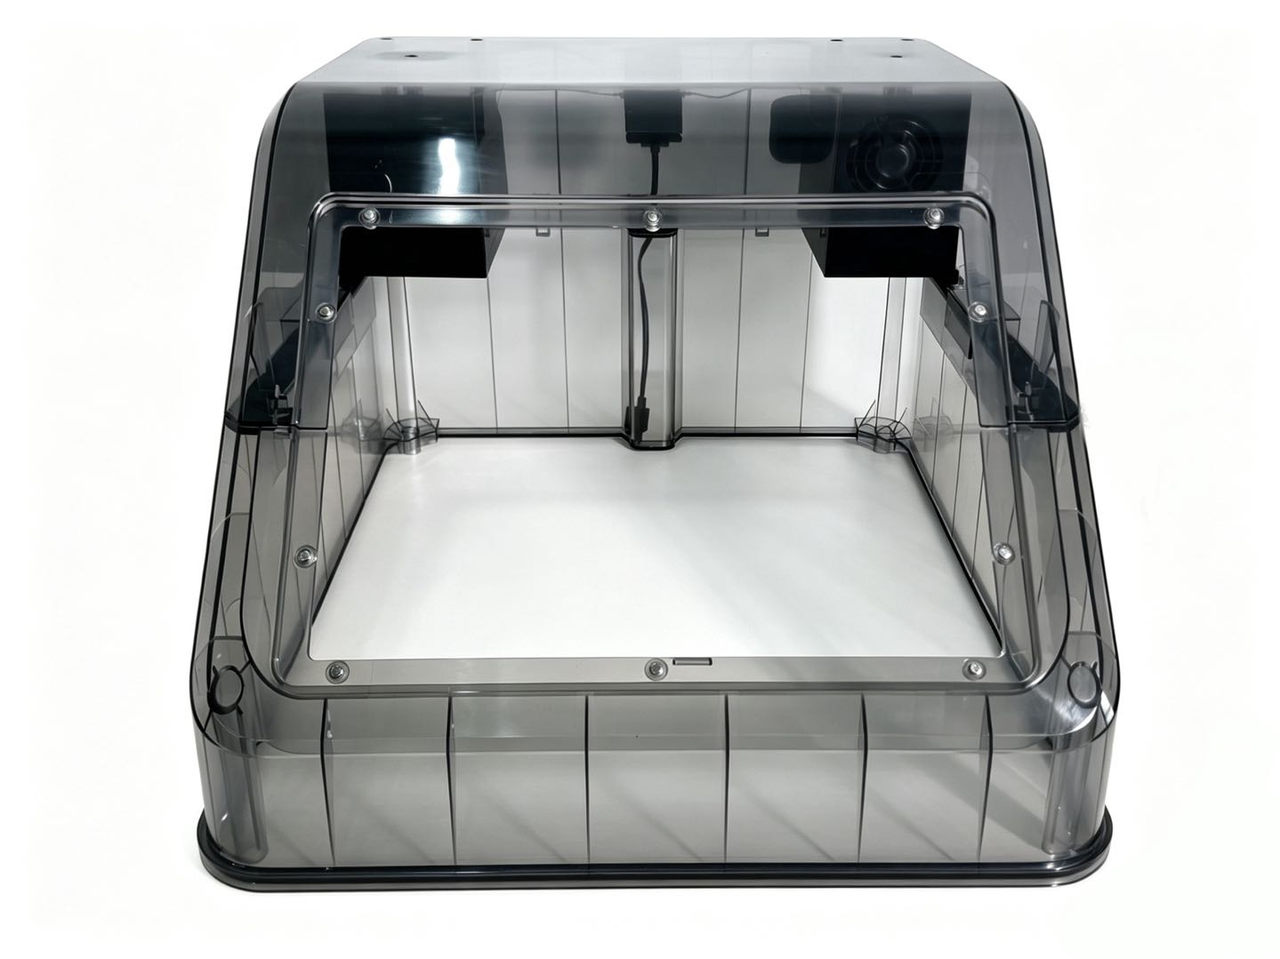
(2) Remove the Top Cover from the printer.
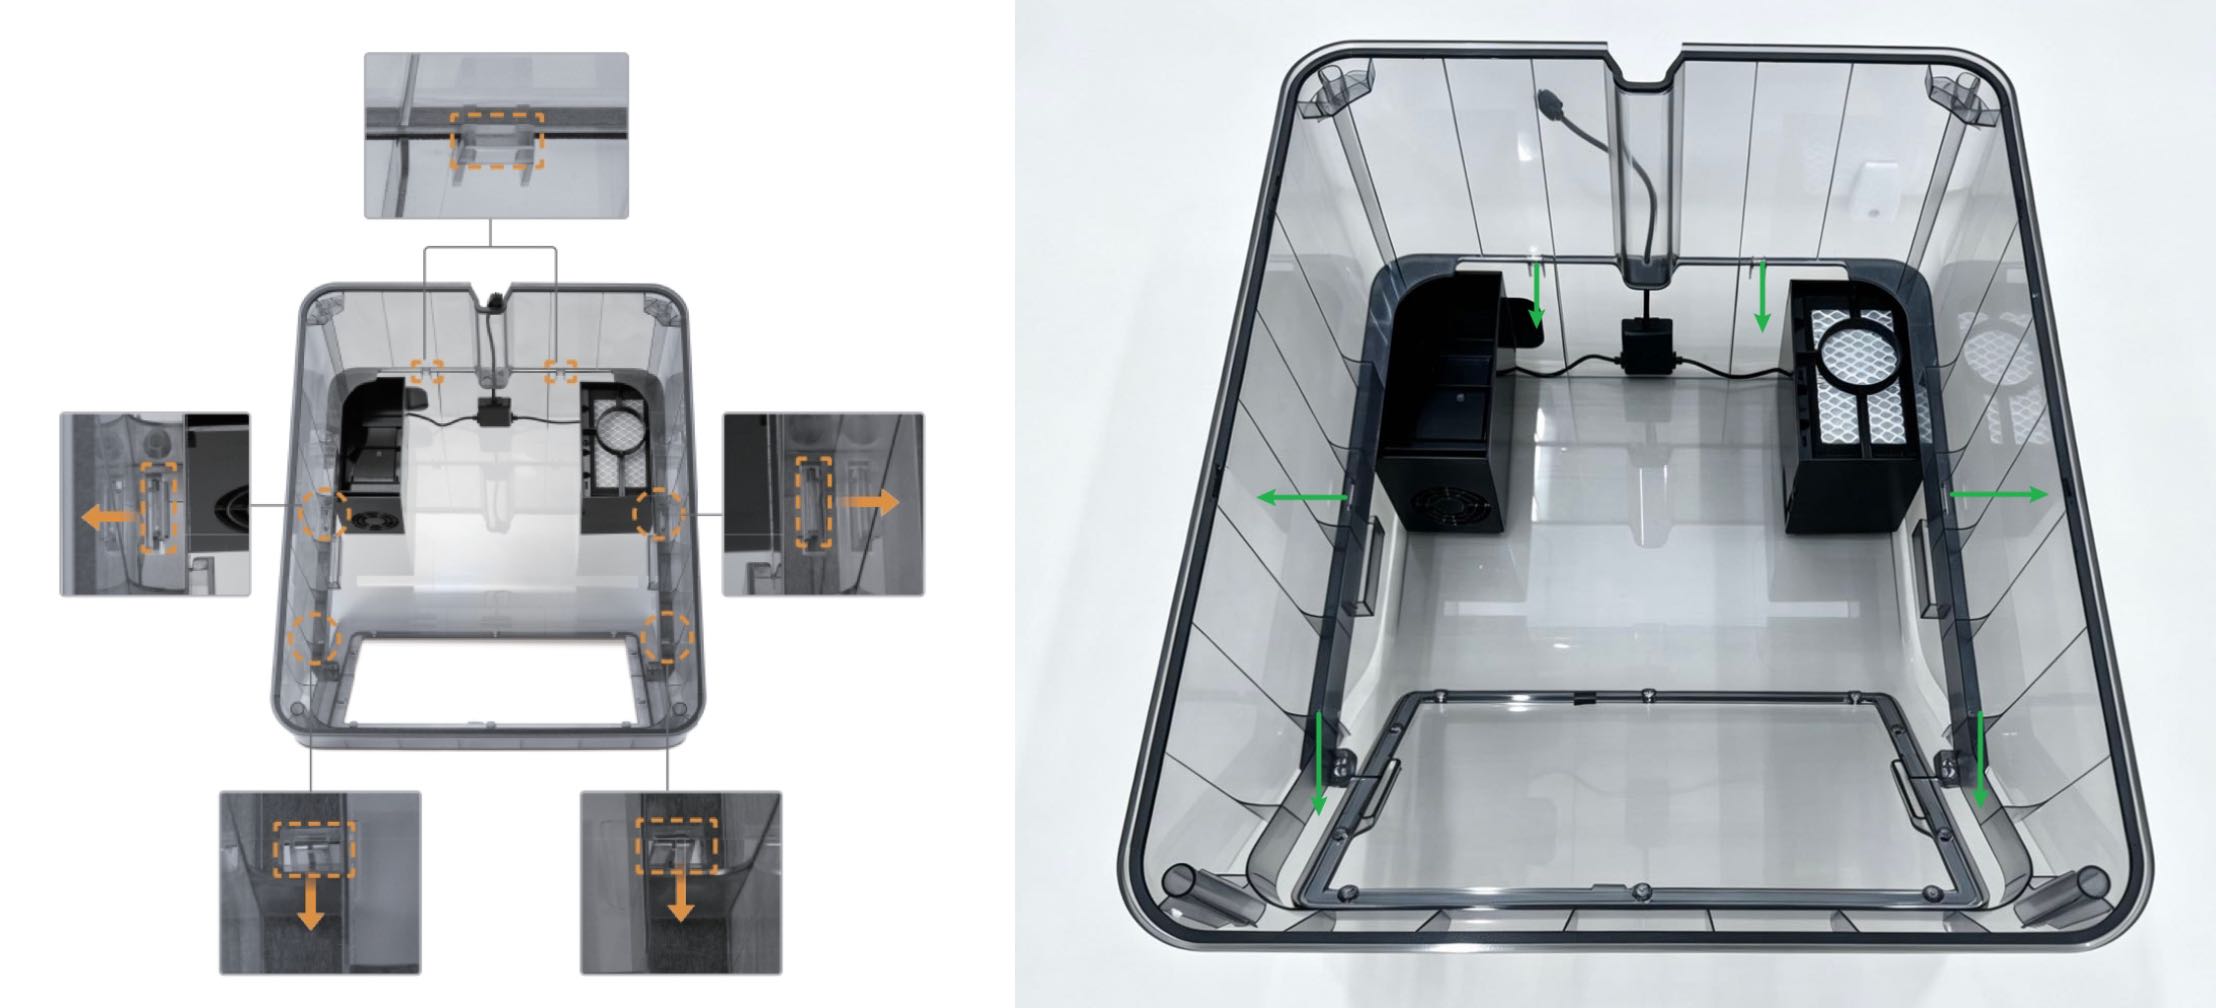
(3) Turn over the Top Cover and unlock the clips in the direction shown in the figure. Once unlocked, remove the Lower Housing and replace it as needed.
¶ Part 2 - Adjust the Heat Dissipation Air Inlet Cover of the External Circulation Kit
(1) Use an H2.0 Hex Key to remove the three screws securing the External Circulation Kit. 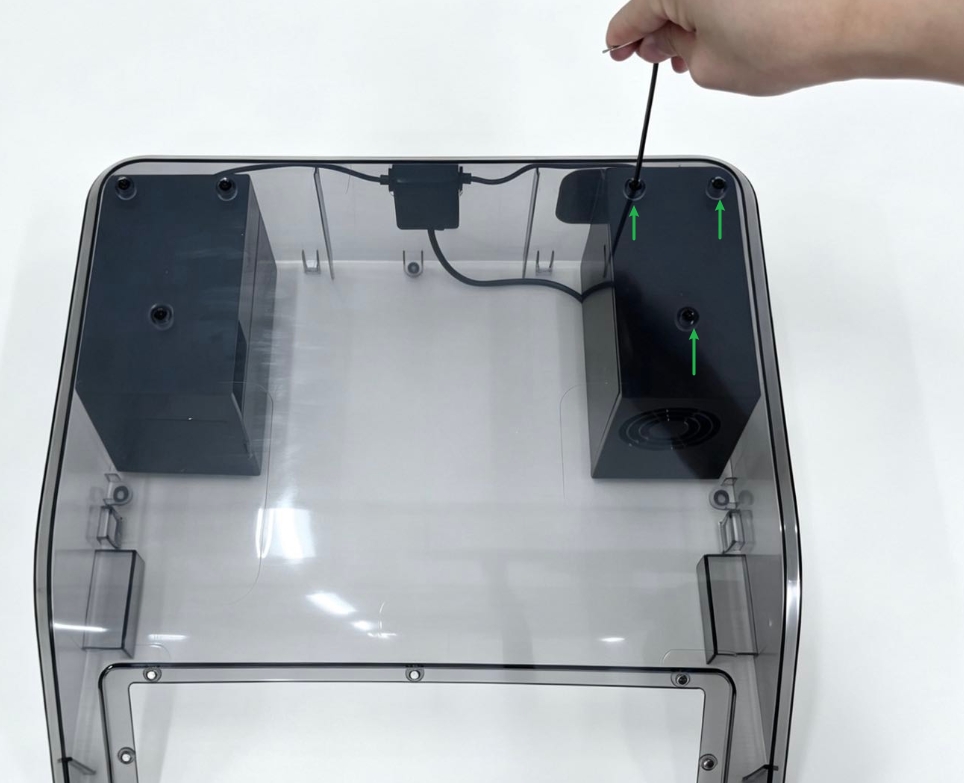
(2) Turn over the Upper Housing Assembly and use an H2.0 Hex Key to remove the screw securing the External Circulation Air Duct. 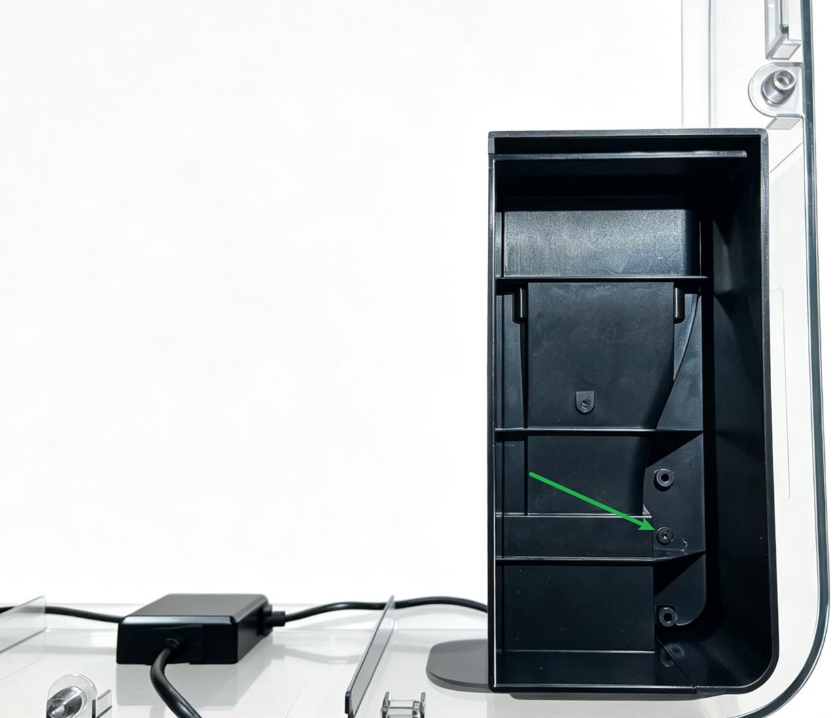
(3) Separate the Air Duct from the Heat Dissipation Air Inlet Cover. 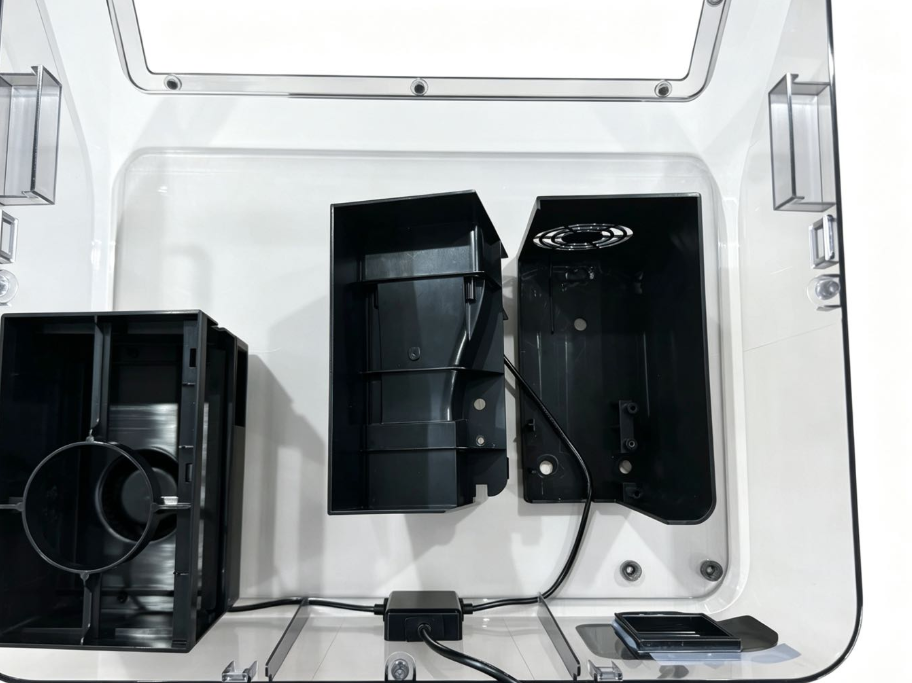
(4) Check whether the clips on the Heat Dissipation Air Inlet Cover are abnormal. If any abnormality is found, please contact technical support. If there is no abnormality, reinstall the External Circulation Kit. 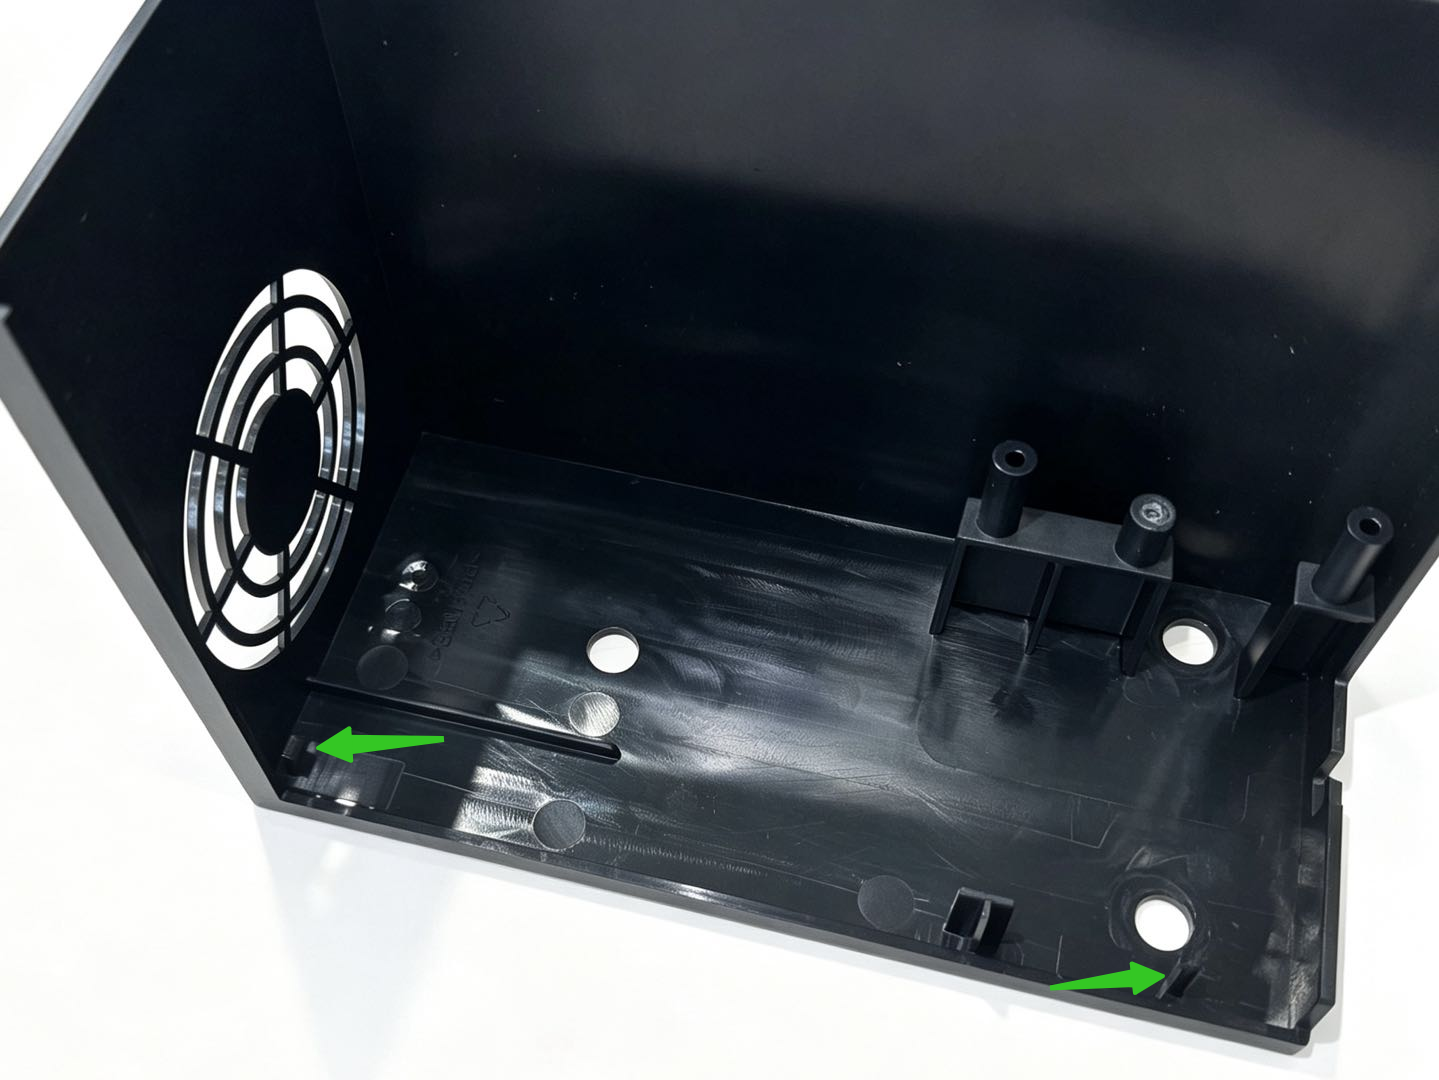
¶ Part 3 - Install the External Circulation Kit
(1) Align the Air Duct Assembly with the Heat Dissipation Air Inlet Cover and secure the cable in the cable slot. (Pay attention to the orientation: the fan should face the same direction as the air outlet of the Heat Dissipation Air Inlet Cover.)
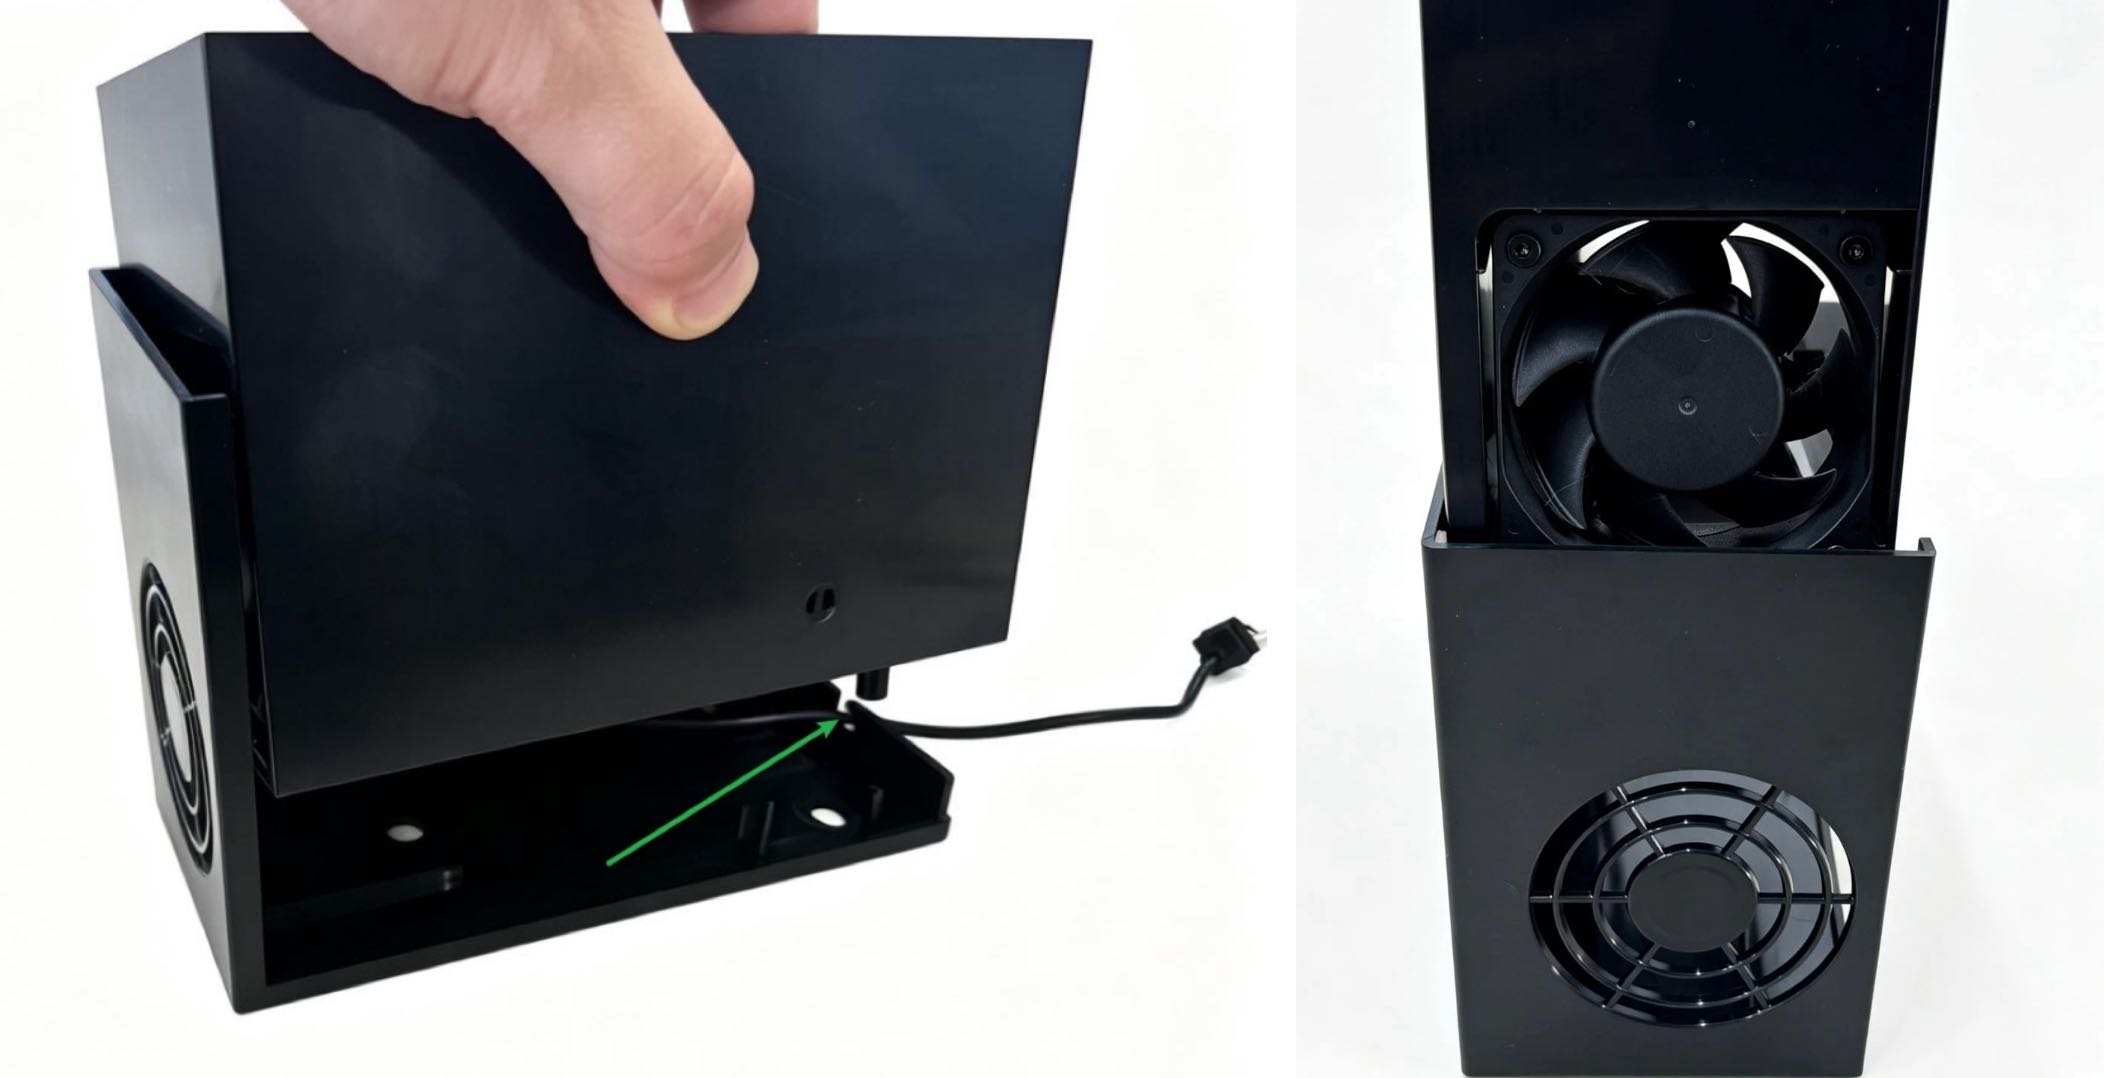
(2) Use an H2.0 Hex Key to tighten the Air Duct securing screw and check whether the assembly has returned to its original position.
(3) Place the External Circulation Kit in the corresponding position. (Make sure the cable does not block the air outlet.) Use an H2.0 Hex Key to tighten the screws securing the External Circulation Kit. 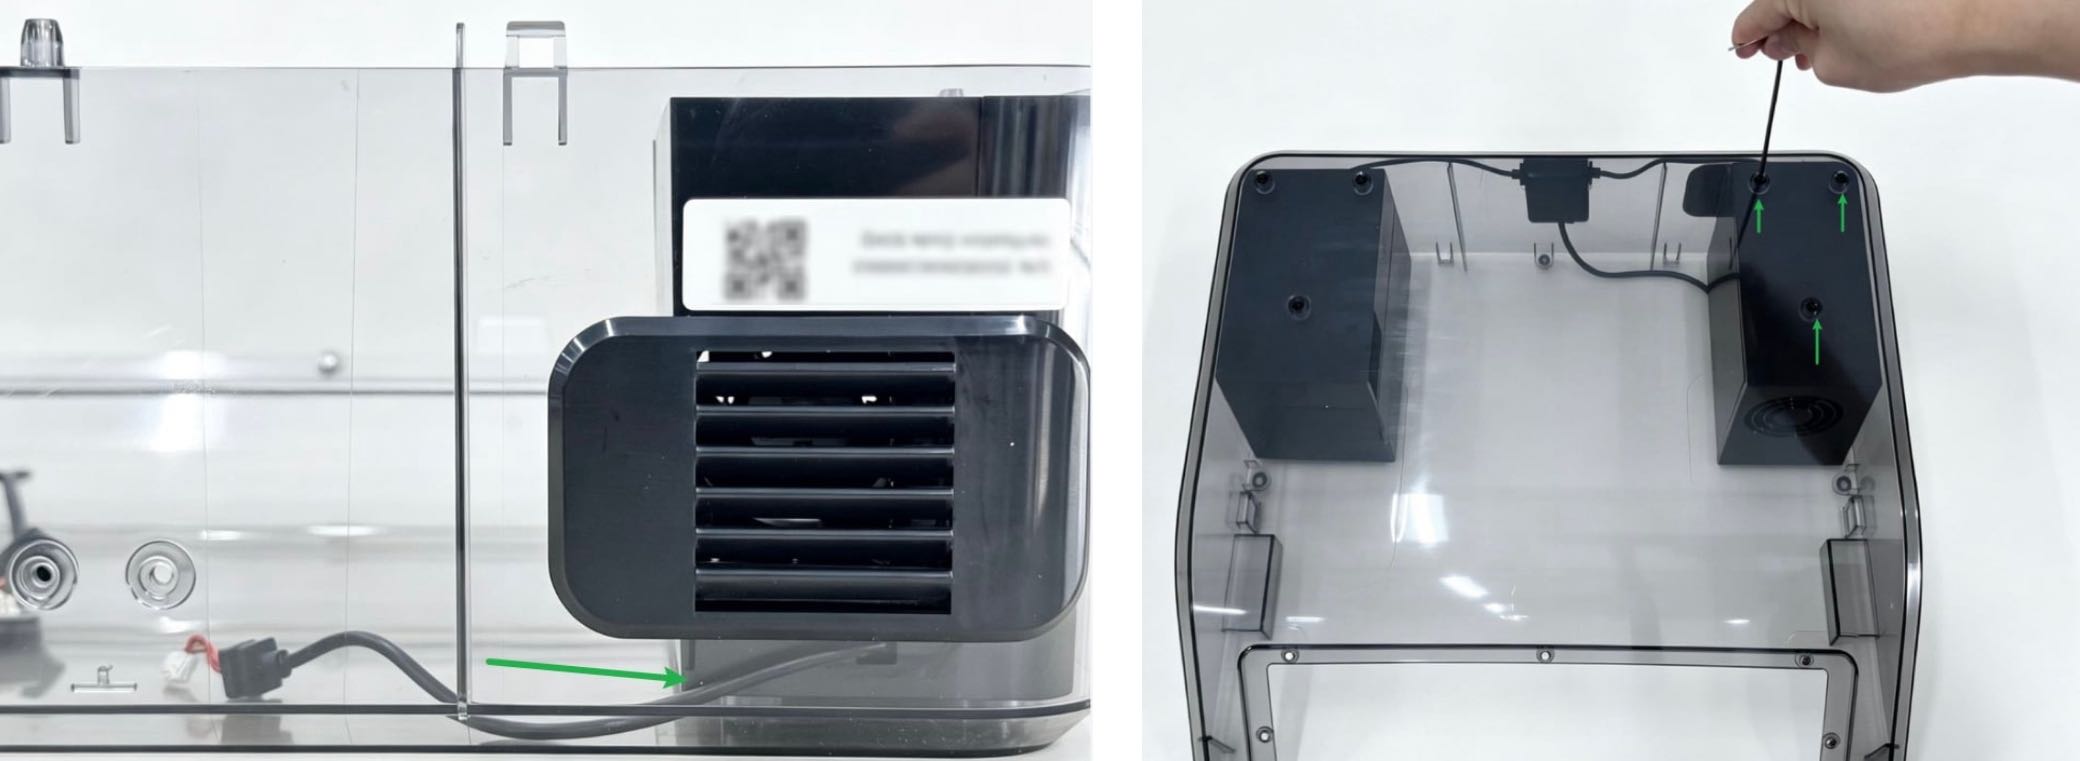
¶ Part 4 - Installing the Top Cover
Refer to the Top Cover User Manual for installation: U1 Top Cover Installation Guide
¶ Endnote
If your issue remains unresolved, please contact technical support, our dedicated support team will be more than willing to assist you in resolving the issue.
If you have any suggestions or feedback about this wiki, feel free to leave a comment below. Every piece of feedback helps us improve our documentation.