¶ Compatibility
This guide applies to the following machine. Please note when referencing:
Machine model: U1
¶ Installation Location
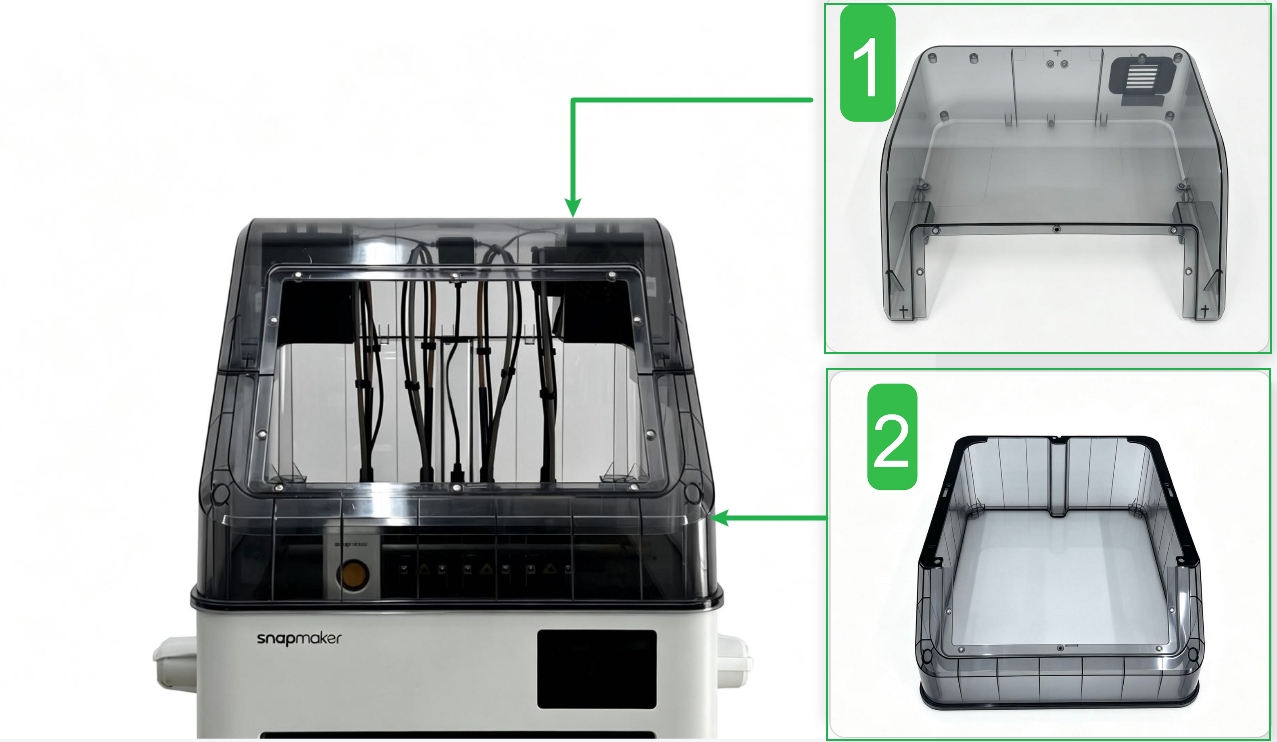
¶ Quick Overview
Replacement Difficulty: ★★☆☆☆ (Easy)
Estimated Time: 20 minutes
¶ Preparation
¶ Procedure
¶ Part 1 - Disassembling the Top Cover
(1) Disconnect the top cover cable and remove the magnetic front door.
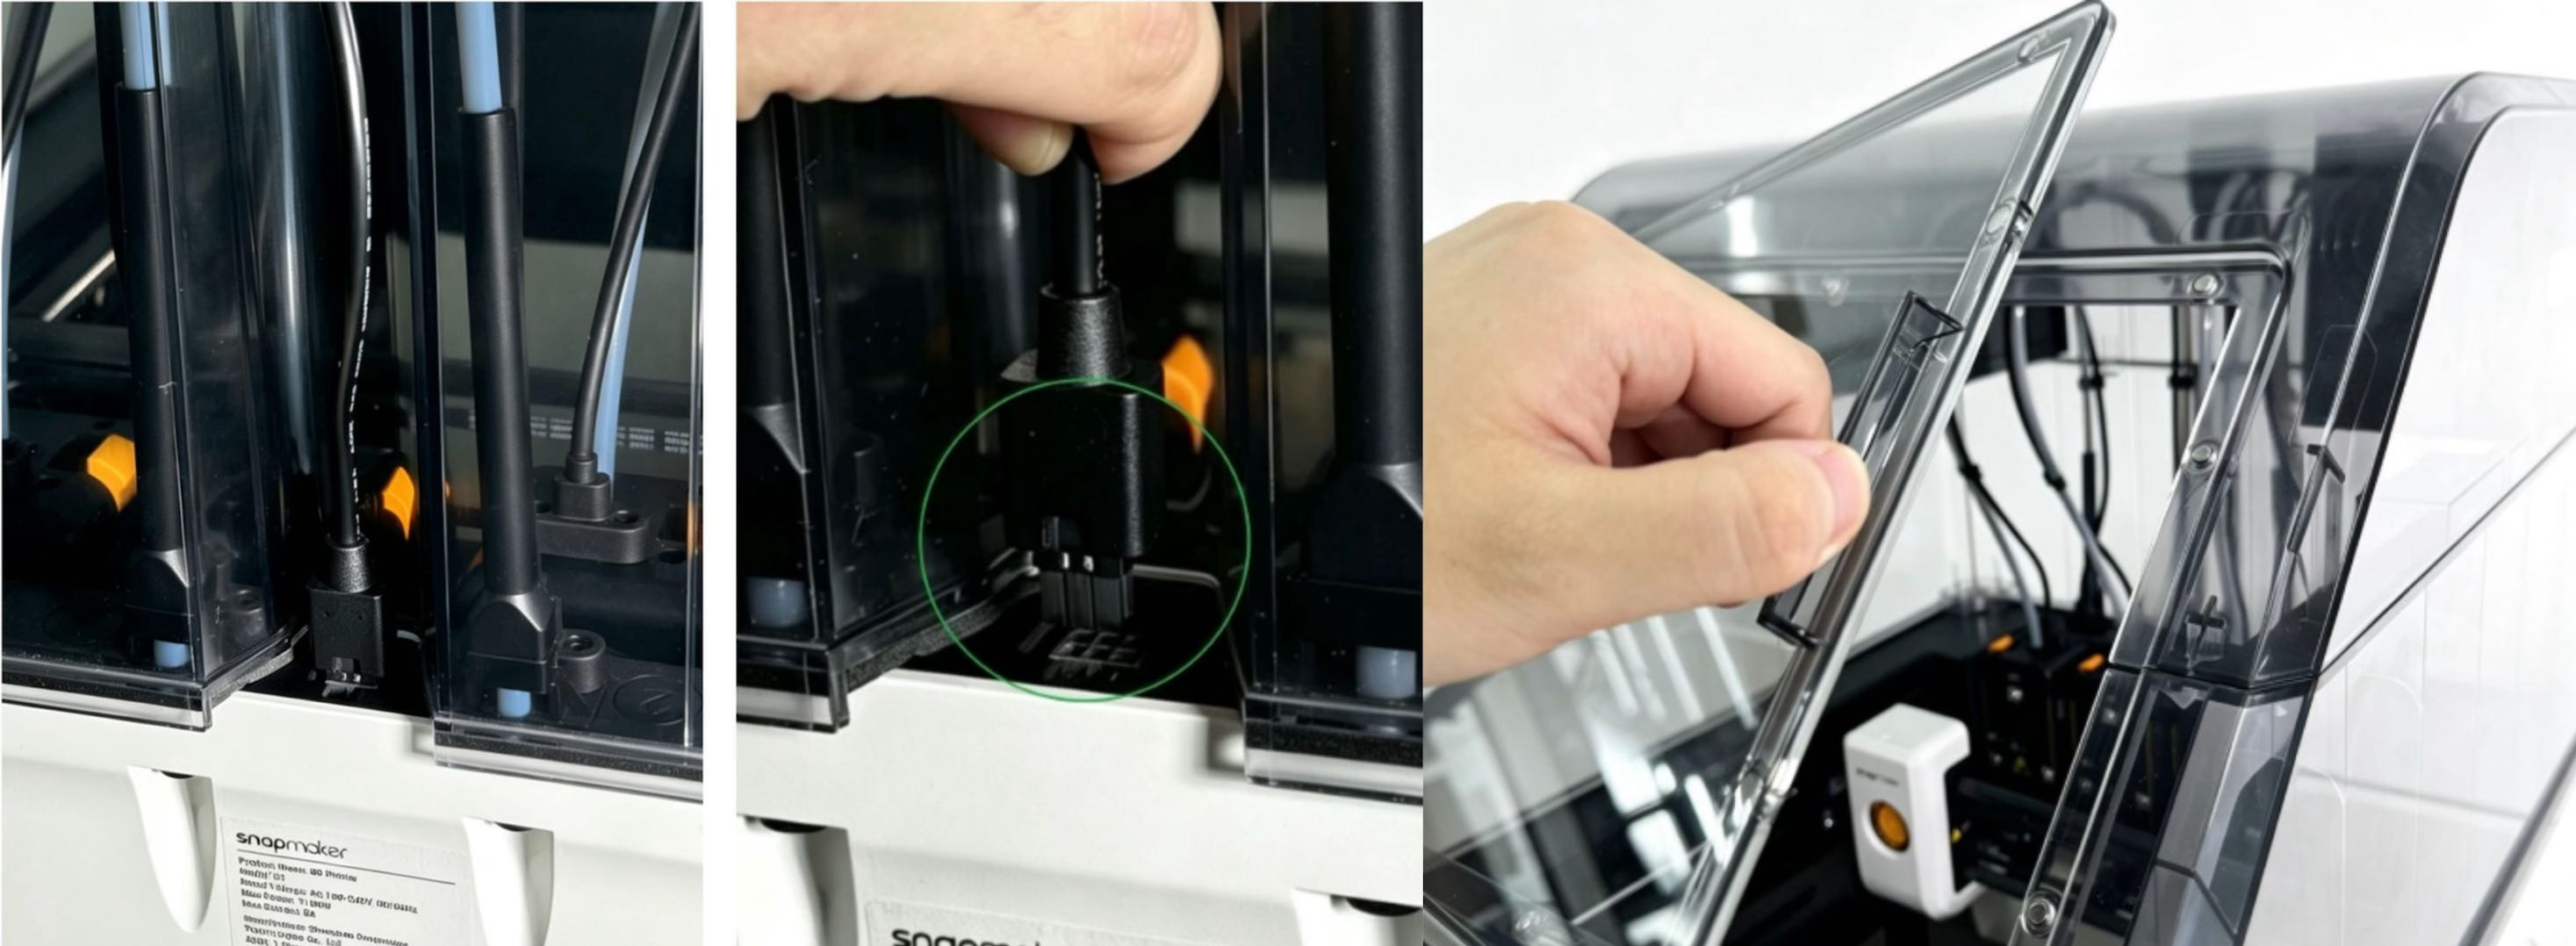
(2) Remove the top cover from the printer.
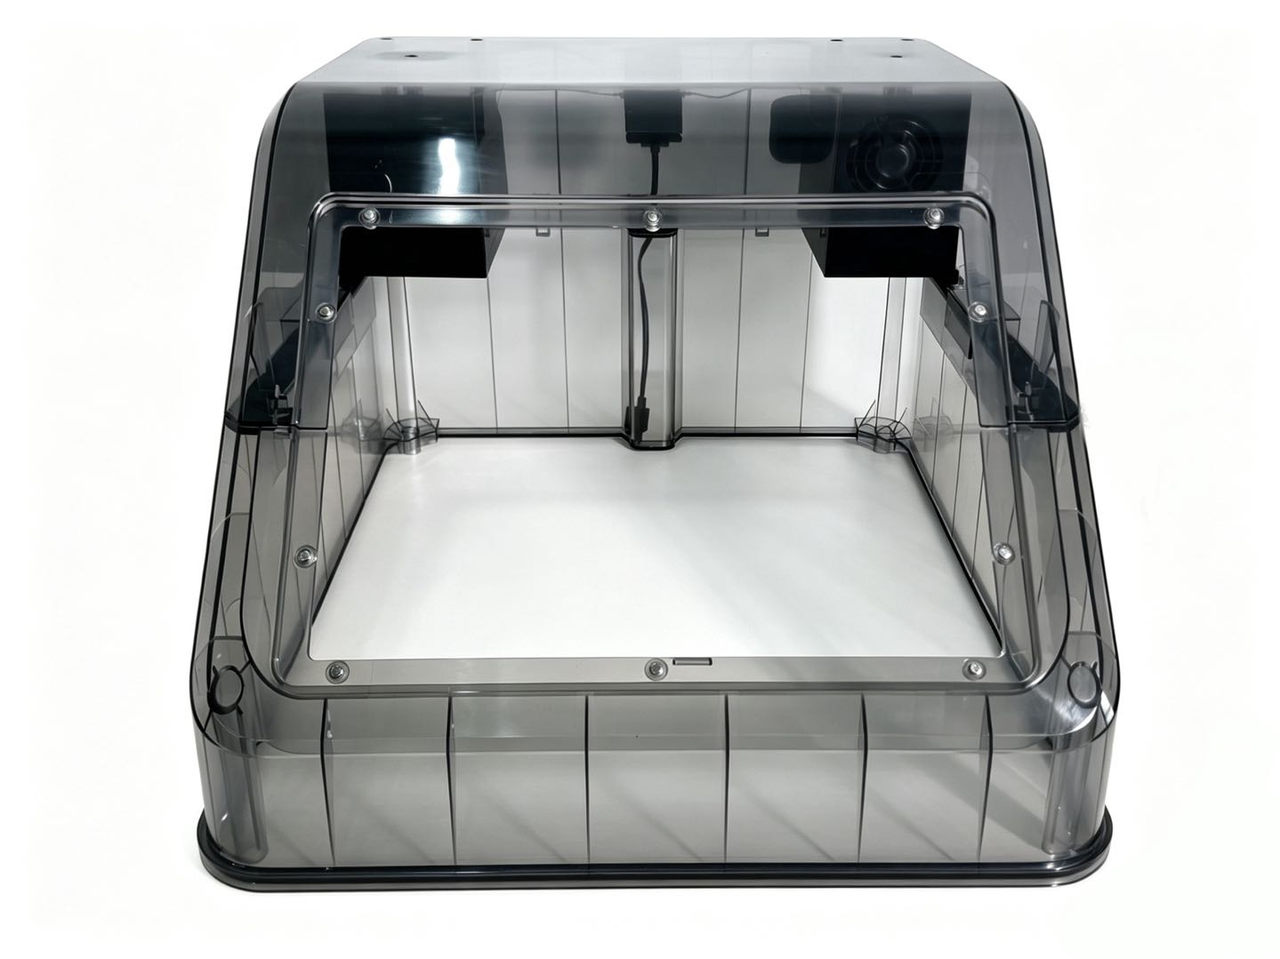
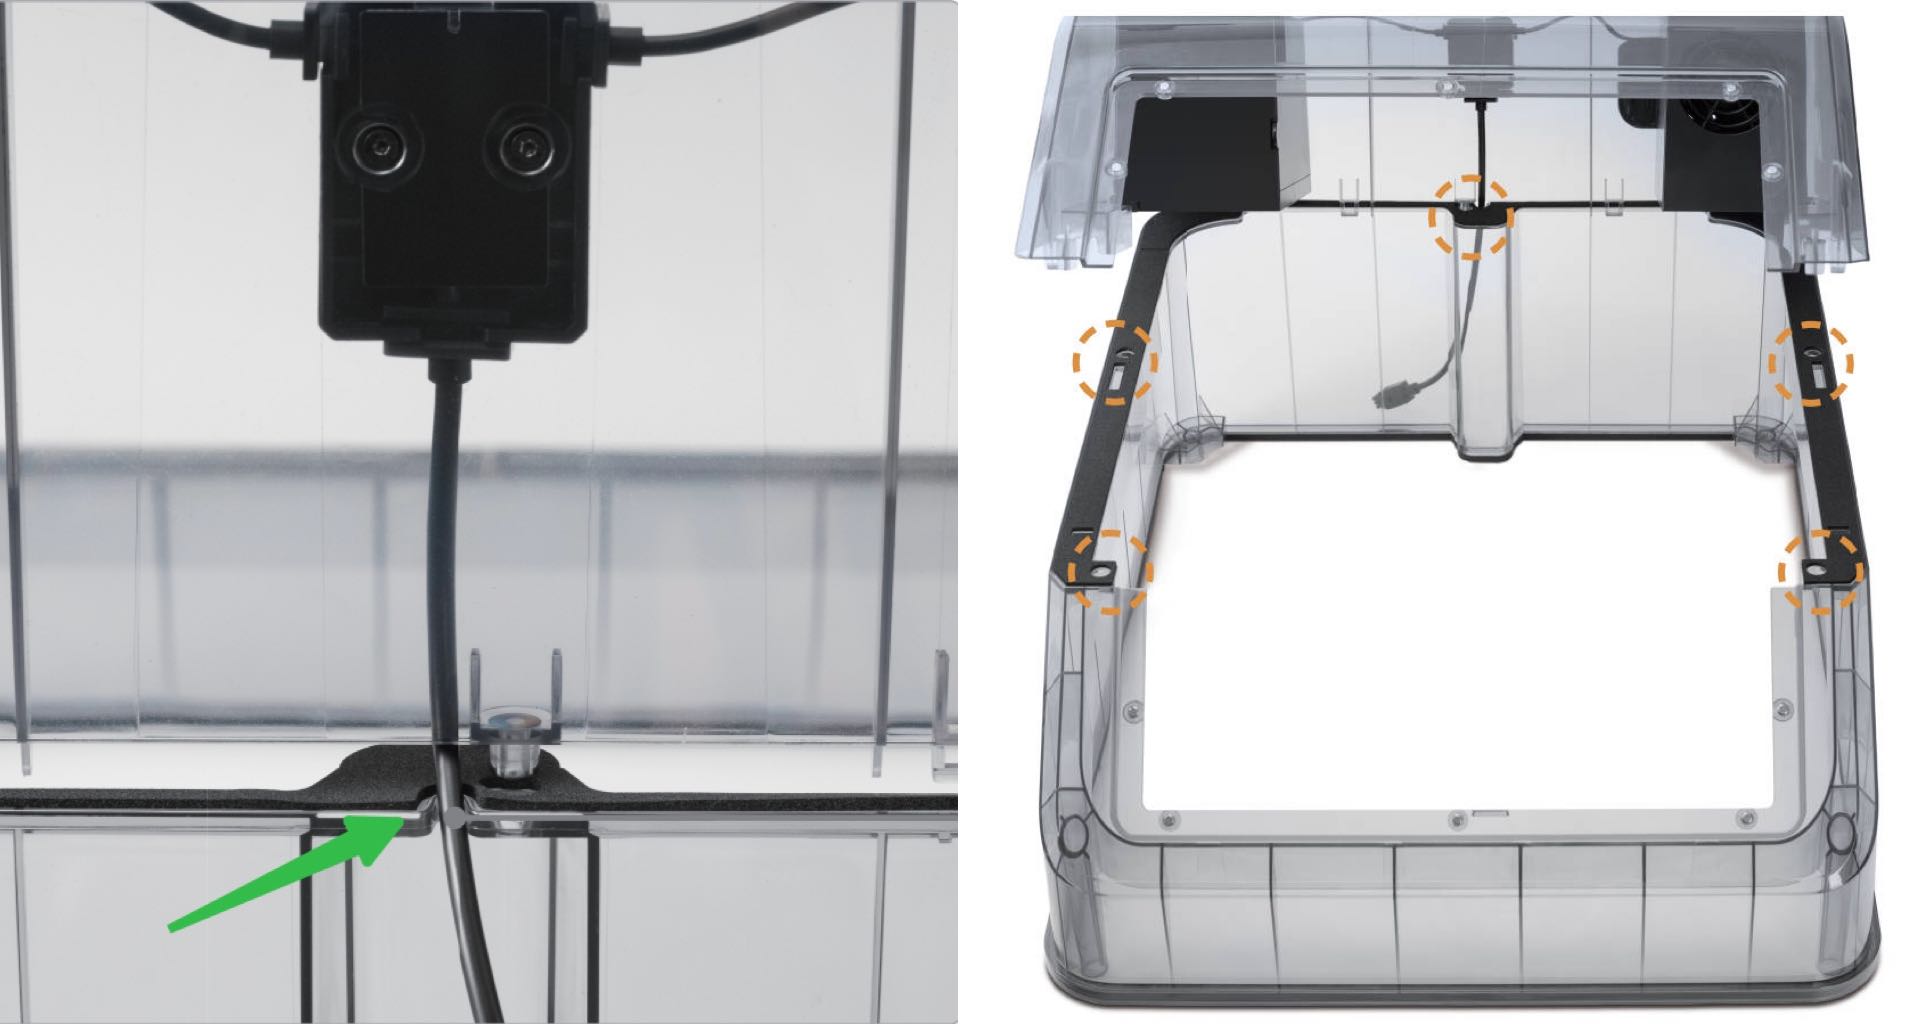
(3) Turn the top cover over and unlock the clips in the direction shown in the figure. Once unlocked, the Lower Housing can be removed and replaced.
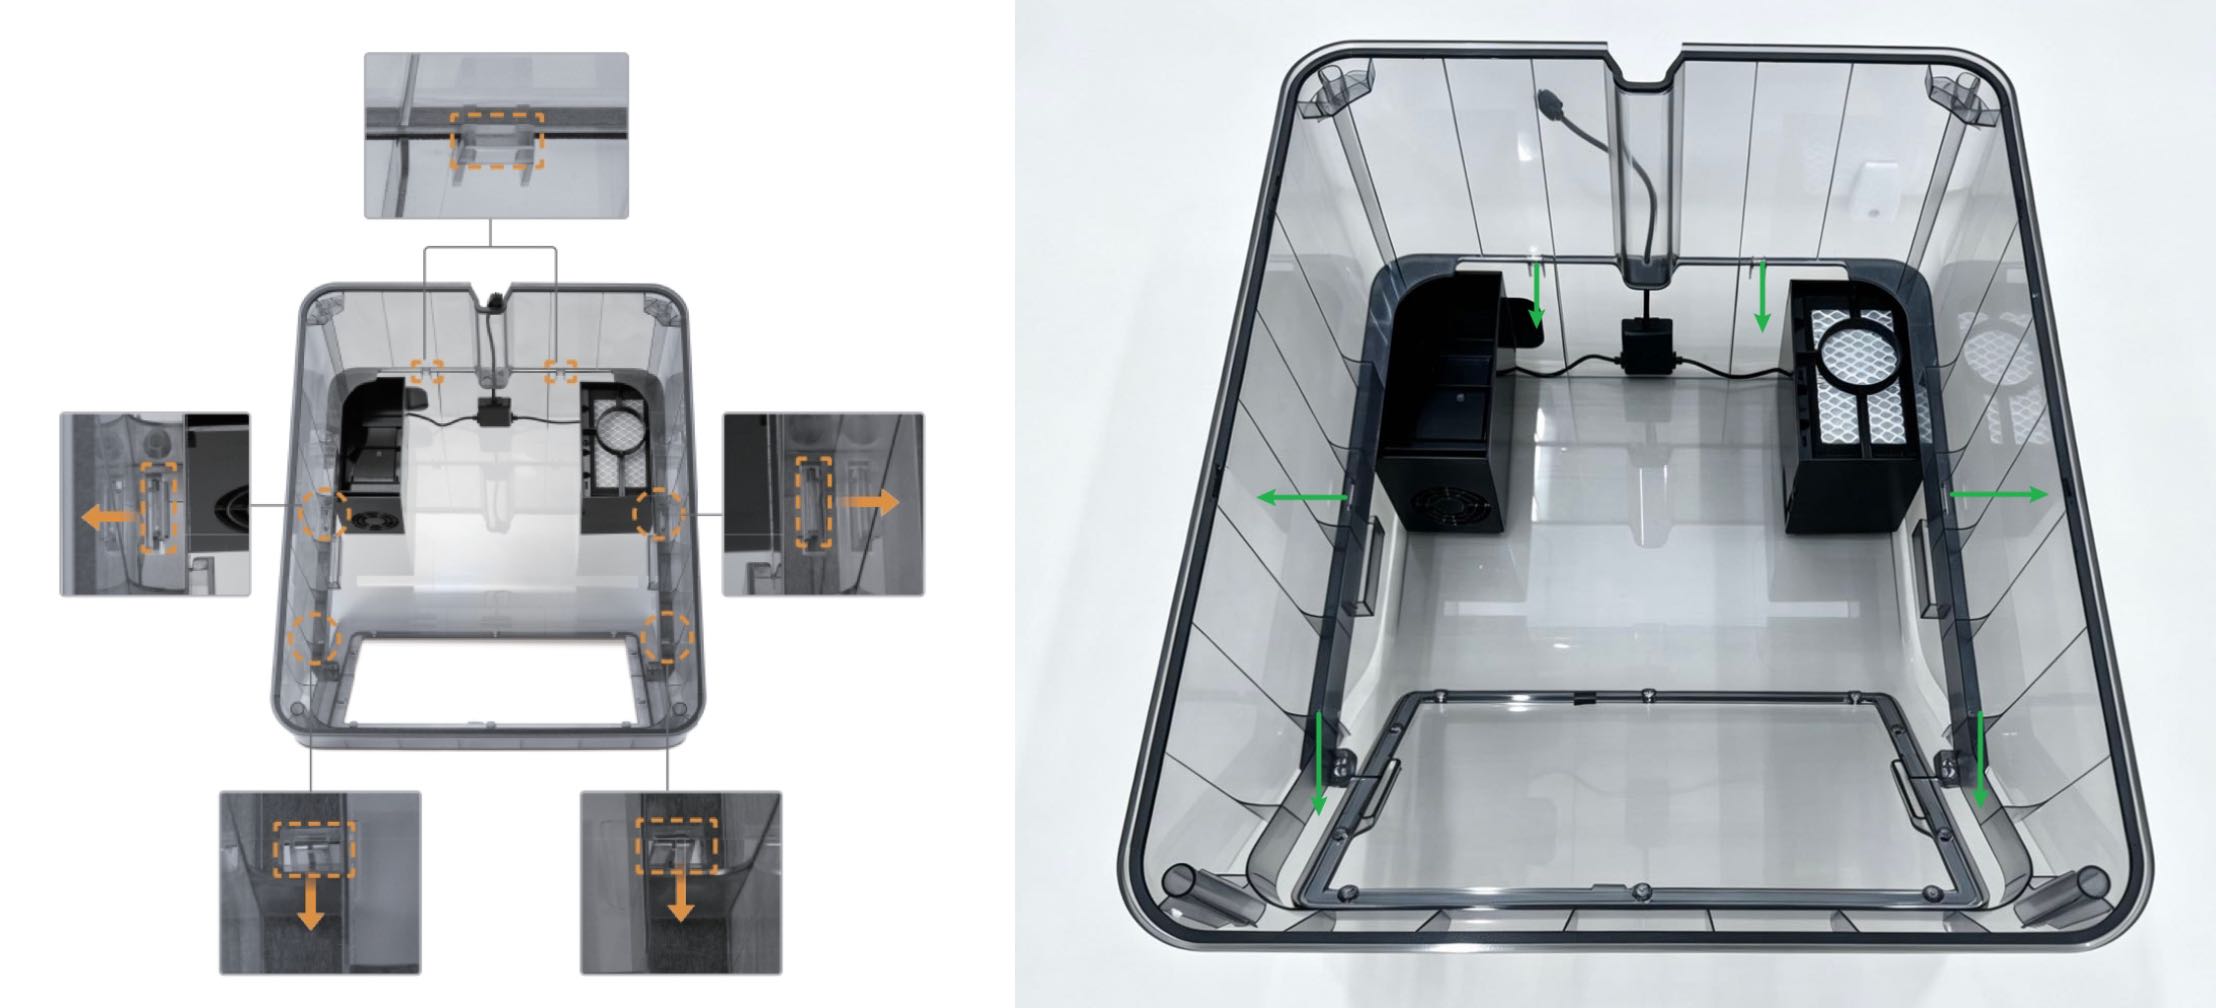
(4) Route the top cover cable into the rear groove. Align the upper housing with the illustrated holes on the lower housing and press to secure in place.
¶ Part 2 - Removing the Upper Housing
(1) Turn the Upper Housing upside down and use an H2.0 Hex Key to remove the 2 screws securing the adapter board.
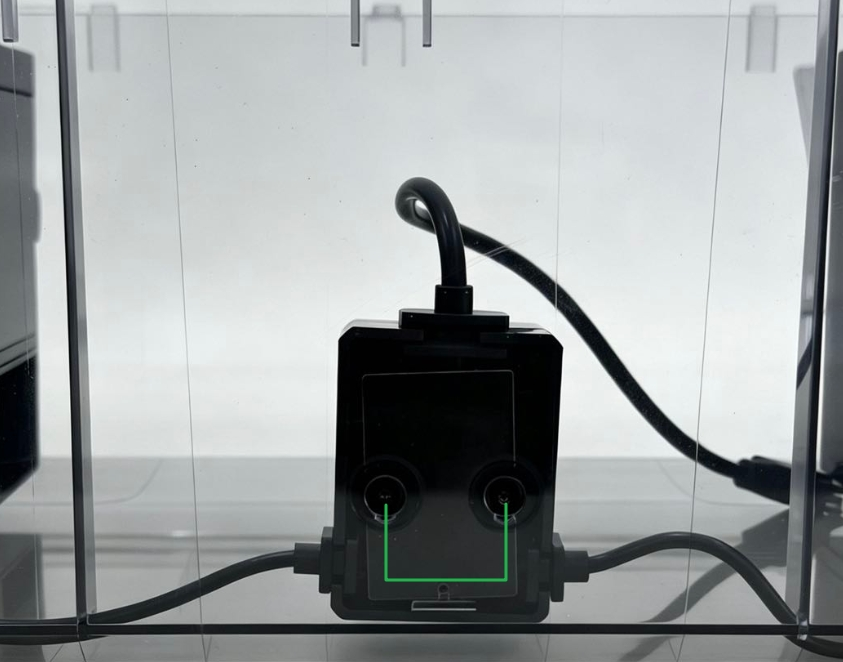
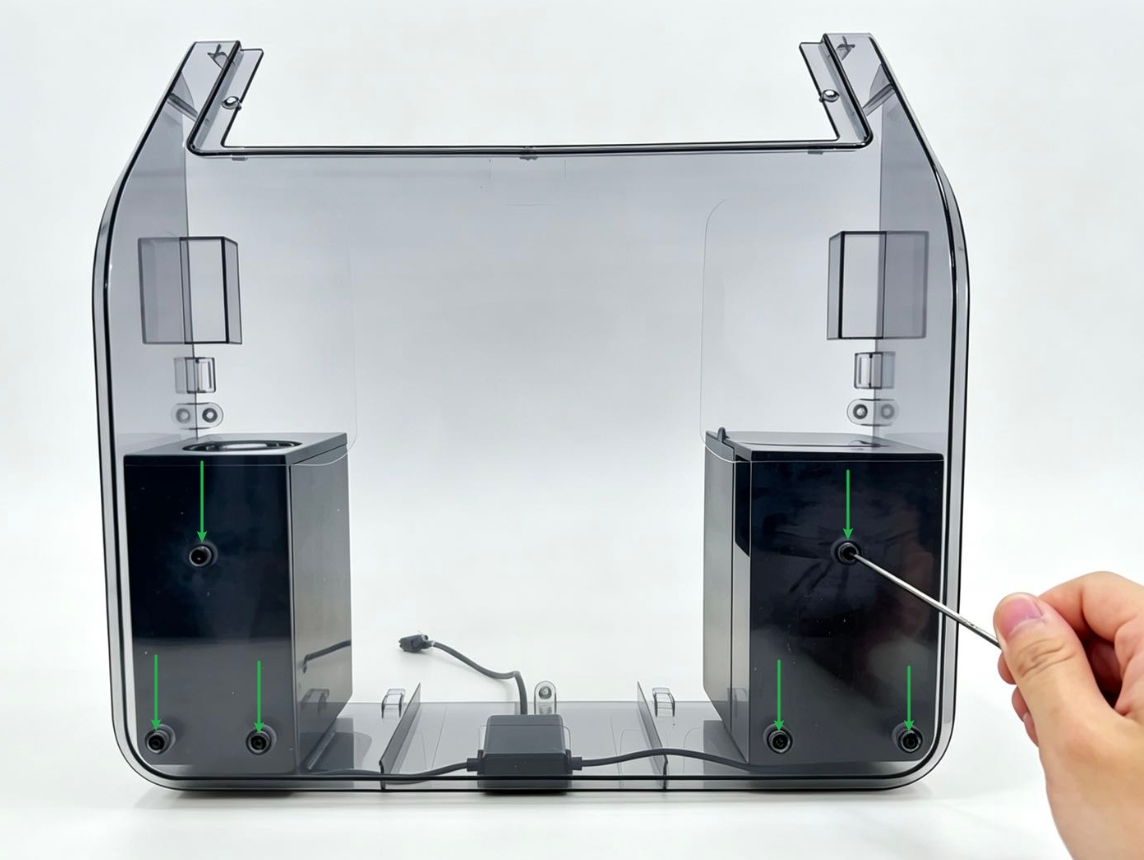
(2) Use an H2.0 Hex Key to remove the 6 screws securing the Internal Circulation Kit and External Circulation Kit.
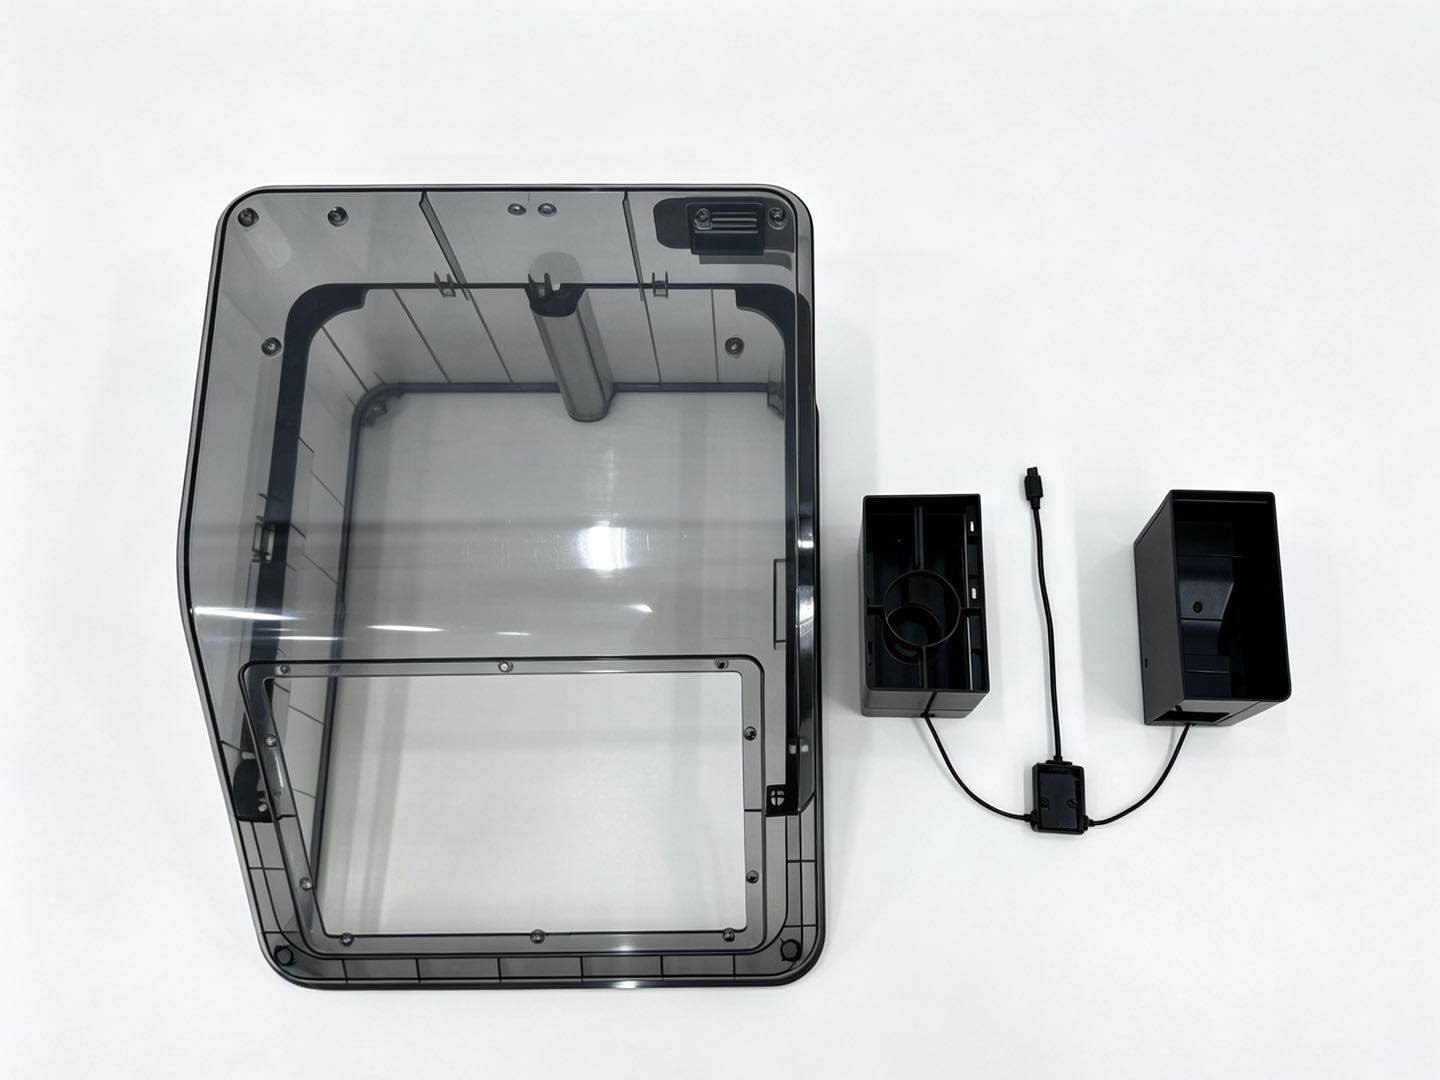
(3) Remove the Internal Circulation Kit and External Circulation Kit.
¶ Part 3 - Installing the Upper Housing
(1) Install the Internal Circulation Kit and External Circulation Kit onto the new Upper Housing, and use an H2.0 Hex Key to tighten the 6 securing screws.
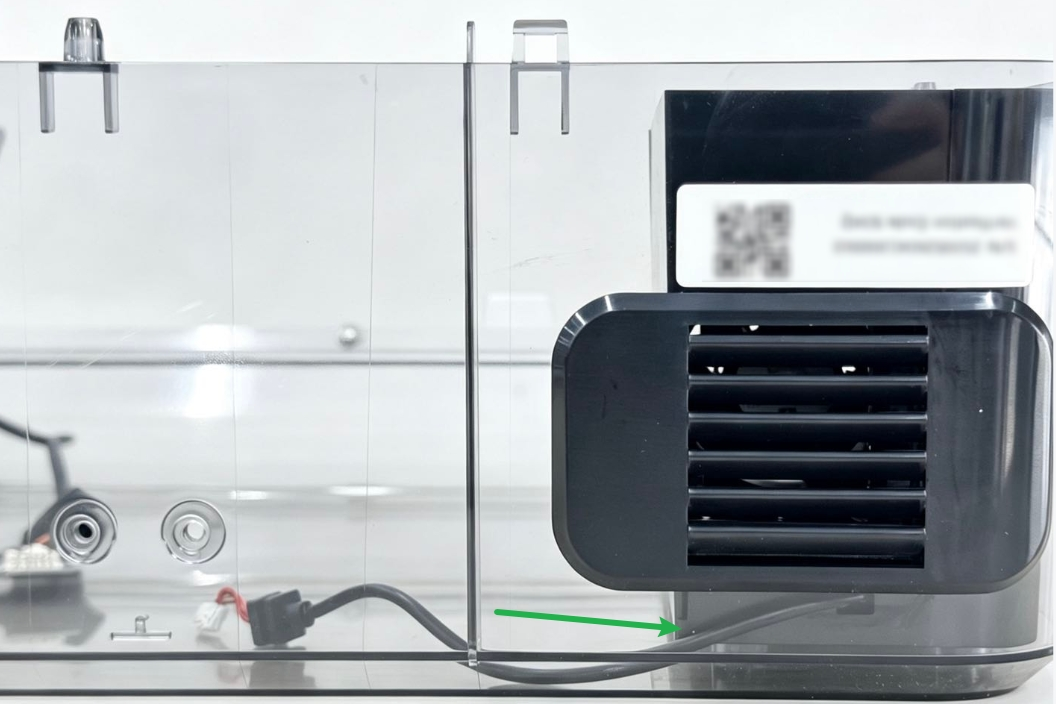
(2) Organize the adapter board cable and fit it into the cable slot, then align the locating pins on the Upper Housing with the notches on the adapter board.
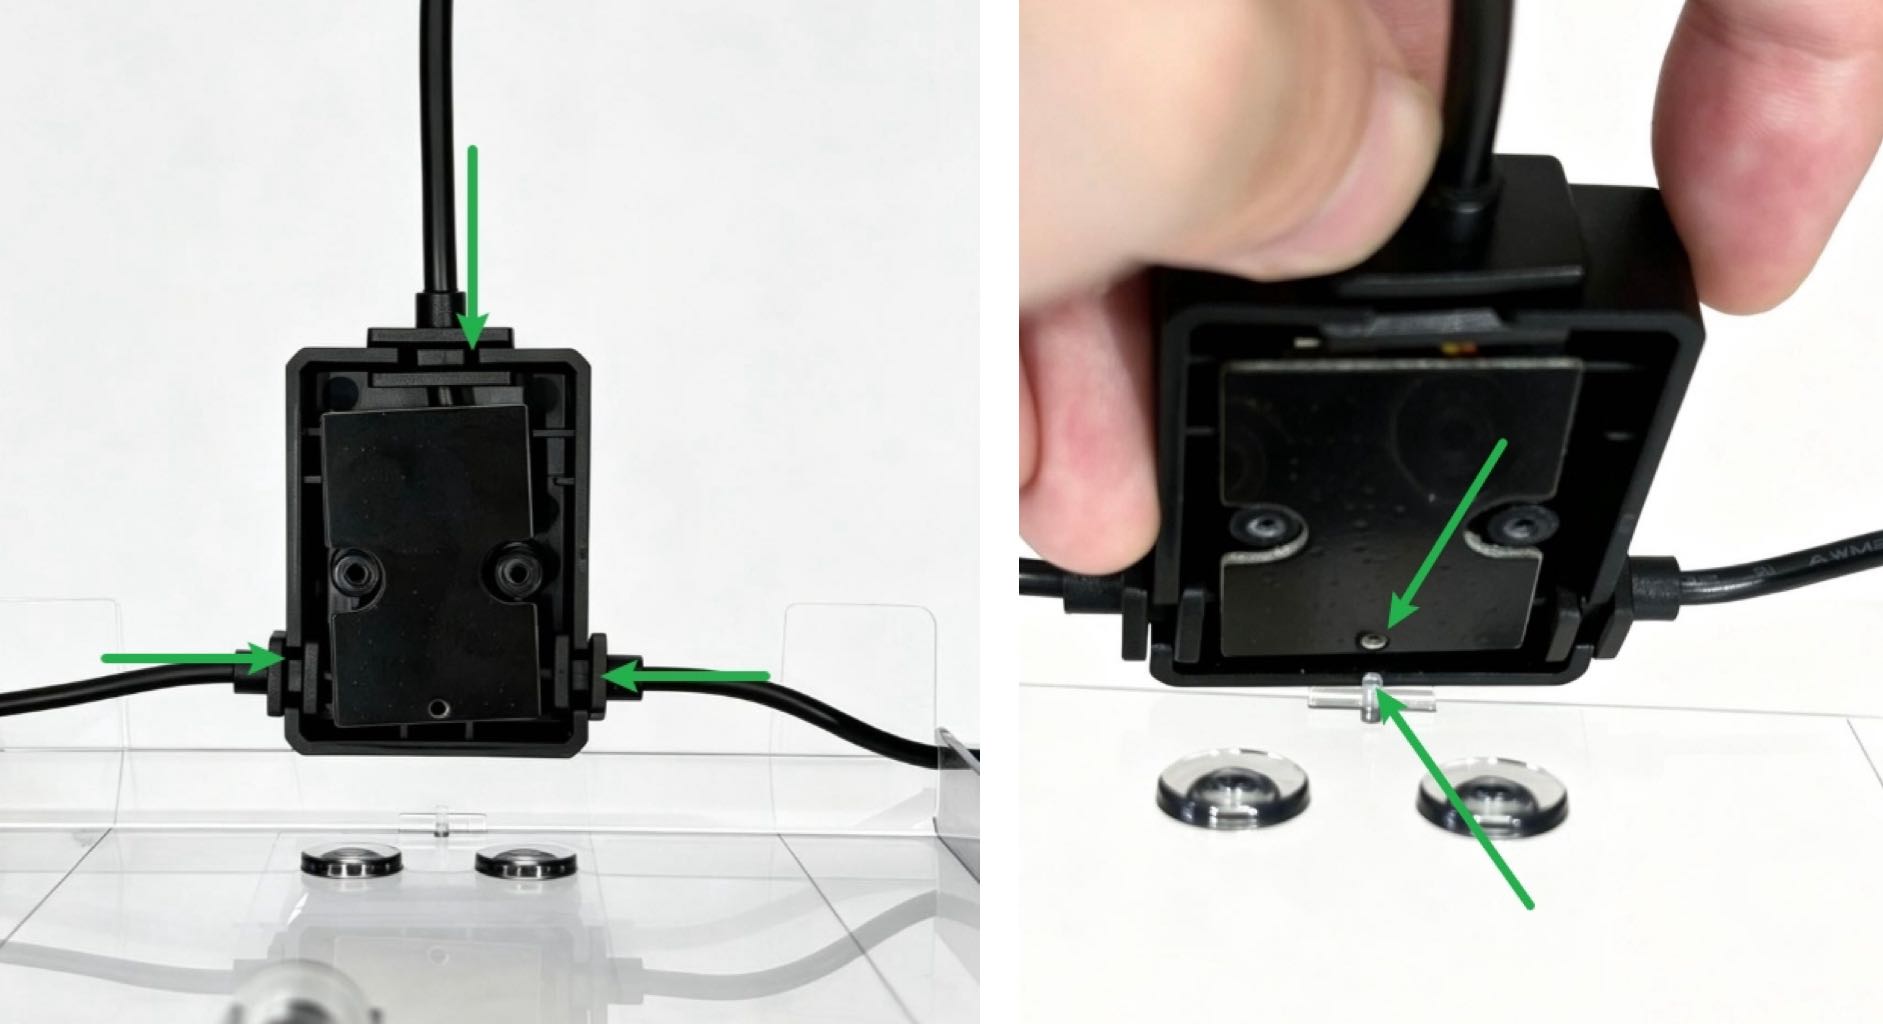
(3) Use an H2.0 Hex Key to tighten the adapter board securing screws.
¶ Part 4 - Installing the Top Cover
Refer to the Top Cover User Manual for installation: U1 Top Cover Installation Guide
¶ Endnote
If your issue remains unresolved, please contact technical support, our dedicated support team will be more than willing to assist you in resolving the issue.
If you have any suggestions or feedback about this wiki, feel free to leave a comment below. Every piece of feedback helps us improve our documentation.